Consul is an open-source tool developed by HashiCorp that provides service discovery, configuration management, and orchestration for microservices applications. It is widely used for automating and managing infrastructure by providing centralized service discovery, health checks, and key-value storage. In this guide, we’ll walk you through the How to Install Consul on Ubuntu 24. By the end of this tutorial, you’ll have Consul up and running on your system, ready to handle service discovery and management tasks.
Update the list of available packages and their versions on your Ubuntu system
apt update
apt-get upgrade
sudo apt install -y gnupg software-properties-common
Download the latest Consul version
Visit the official Consul downloads page and copy the download link for the latest version of Consul. For example, to download Consul version 1.15.0, run:
wget https://releases.hashicorp.com/consul/1.15.0/consul_1.15.0_linux_amd64.zipInstall unzip utility (if not installed):
sudo apt install unzip -yExtract the Consul binary:
unzip consul_1.15.0_linux_amd64.zipMove the binary to a directory in your PATH (e.g., /usr/local/bin):
sudo mv consul /usr/local/bin/Verify the Consul installation:
consul --versionThis will show you the installed version of Consul, confirming that the installation was successful.
Create user consol and give permissions
sudo useradd --system --create-home --shell /bin/false consul
sudo groupadd consul
chown -R consul:consul /usr/local/bin/consul
chown -R consul:consul /etc/consul.d/
mkdir -p /opt/consul
chown -R consul:consul /opt/consul
Enable and Start Consul Service
Start Consul as a service:
To start Consul as a service on your system and run it in the background, use the following commands:
First, create a Consul configuration file:
sudo nano /etc/consul.d/consul.hclAdd the following configuration:
data_dir = "/opt/consul"
client_addr = "0.0.0.0"
bind_addr = "127.0.0.1"
advertise_addr = "127.0.0.1"
server = true
bootstrap_expect = 1
# Enable the Consul UI
ui = true
Create a systemd service for Consul:
Create the Consul service file:
sudo nano /etc/systemd/system/consul.serviceAdd the following contents:
[Unit]
Description=Consul
Documentation=https://www.consul.io/docs
After=network.target

[Service]
ExecStart=/usr/local/bin/consul agent -bind=127.0.0.1 -config-dir=/etc/consul.d
Restart=on-failure
User=consul
Group=consul
LimitNOFILE=65536
LimitNPROC=65536

[Install]
WantedBy=multi-user.target
Reload systemd to apply the new service configuration:
systemctl daemon-reloadStart and enable the Consul service:
systemctl start consul
systemctl enable consul
Check the status of Consul
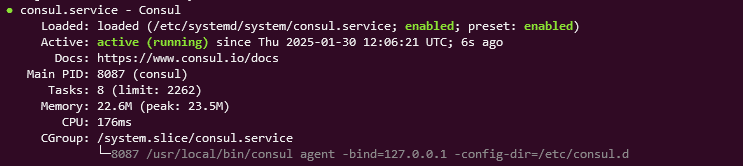
systemctl status consulIf everything is set up correctly, Consul should now be running as a service.
Verify Consul Installation
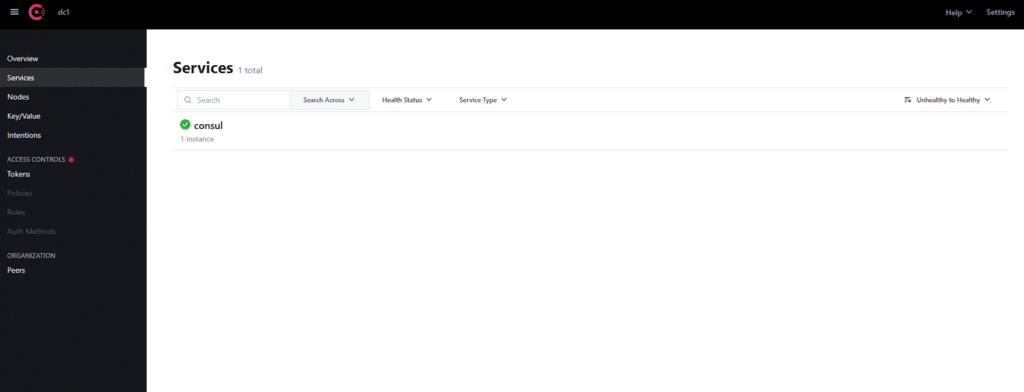
Access the Consul Web UI:
Once Consul is up and running, you can access the Consul web UI by navigating to:
http://<your-server-ip>:8500
The default port for Consul’s UI is 8500.
If you need further assistance on how to Install Consul on Ubuntu 24, or if you encounter any issues during the process, feel free to reach out to our support team. Our experts are available to provide guidance on installation, configuration, and troubleshooting. Contact us today, and we’ll help you successfully set up Consul on Ubuntu 24 for your infrastructure.
